The wet plate collodion process is becoming increasingly popular as photographers search for more unique, and equally eye-catching ways of taking photos. This almost abandoned technique was once the most advanced photographic process available, but was overtaken by dry plates, celluloid film and more recently digital photography. The effect is highly sought after because of the amazing quality of detail it adds to portraits. Here’s how you can apply the wet plate collodion effect to any portrait in Photoshop.
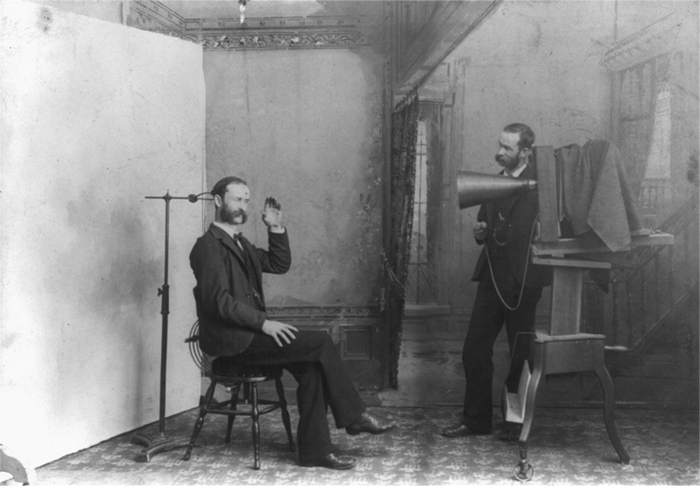
The wet plate collodion process requires glass plates to be coated, sensitised, exposed and developed within a window of roughly fifteen minutes. The plates must remain moist in this time. Exposure times in the 1900s were slow because of the light sensitivity of the plates. This meant portrait sitters had to sit incredibly still with a head brace holding their head still.
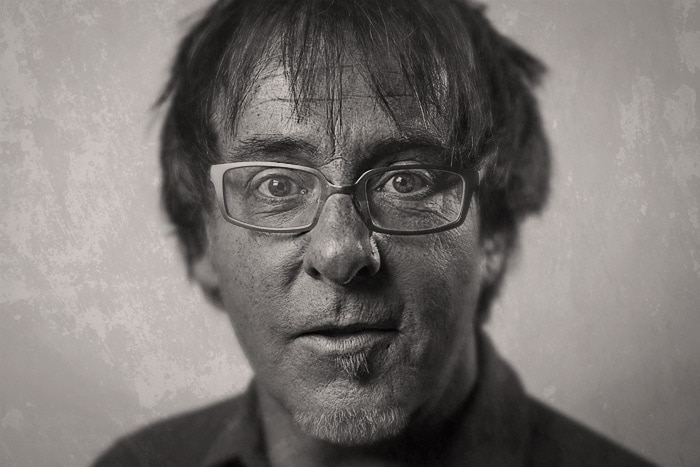
The best images to use for this technique are head and shoulders portraits. Waist level portraits can work well, but the wider the image the more difficult masking of the blur Layers becomes. You’ll also need a texture image of something like peeling paint, rust or a grungy wall. A wet plate rebate is also useful to create the edges – these can be found online. Here’s how to create a wet plate collodion effect in Photoshop. Check out the video tutorial below and scroll down to read written tutorial.
Wet plate collodion video tutorial
Wet plate collodion effect tutorial
1. Apply High Pass sharpening
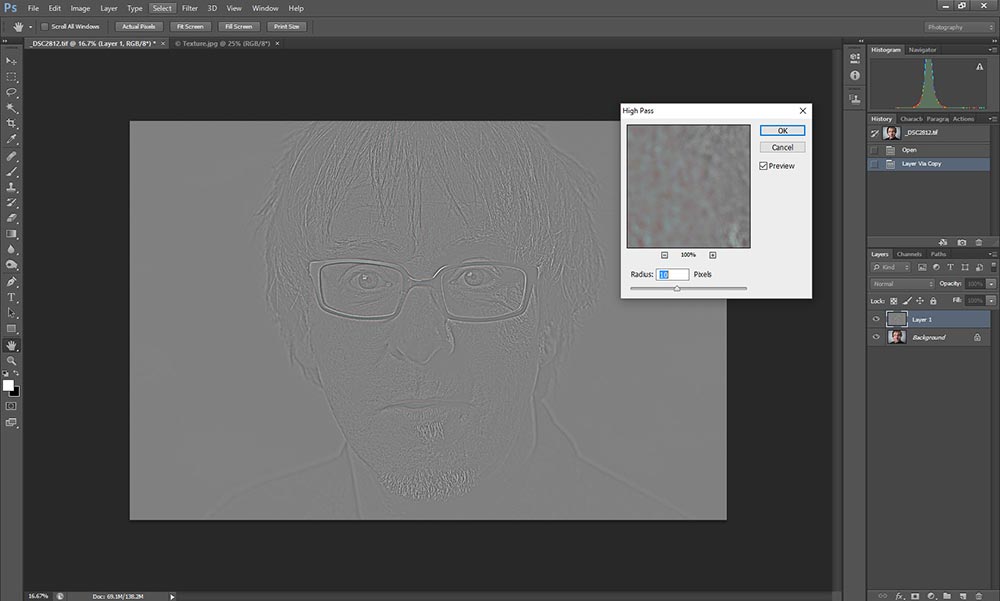
Open your portrait image in Photoshop and press Ctrl+J to copy the Background to a new Layer. Next go to Filter>Other>High Pass and set the Radius to 10 Pixels for a head and shoulders shot, or 5 Pixels for a waist level portrait. Now go to the Layers panel and click on the Blending modes dropdown menu at the top that’s set to normal by default, and select Overlay from the list of options.
2. Add Lens and Movement Blur
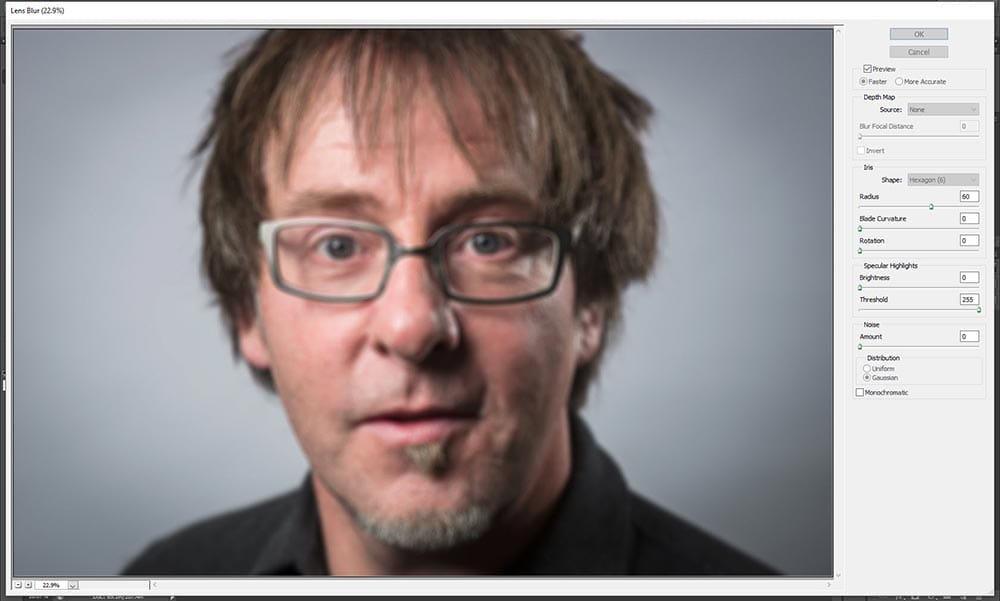
Hold down Ctrl+Shift+Alt+E to merge the visble Layers into a new Layer at the top of the stack. This will now be active. We need to do this because adding blur to the previous Layer will not show up. Next Go to Filter>Blur>Lens Blur on the main Photoshop menu and use all of the default settings except for Radius, which should be set to 60. Click OK. Go back to the menu and click on Filter>Blur>Motion Blur. When the dialogue box opens set the Angle to 10, Distance to 50 and hit OK.
3. Mask out an area of blur
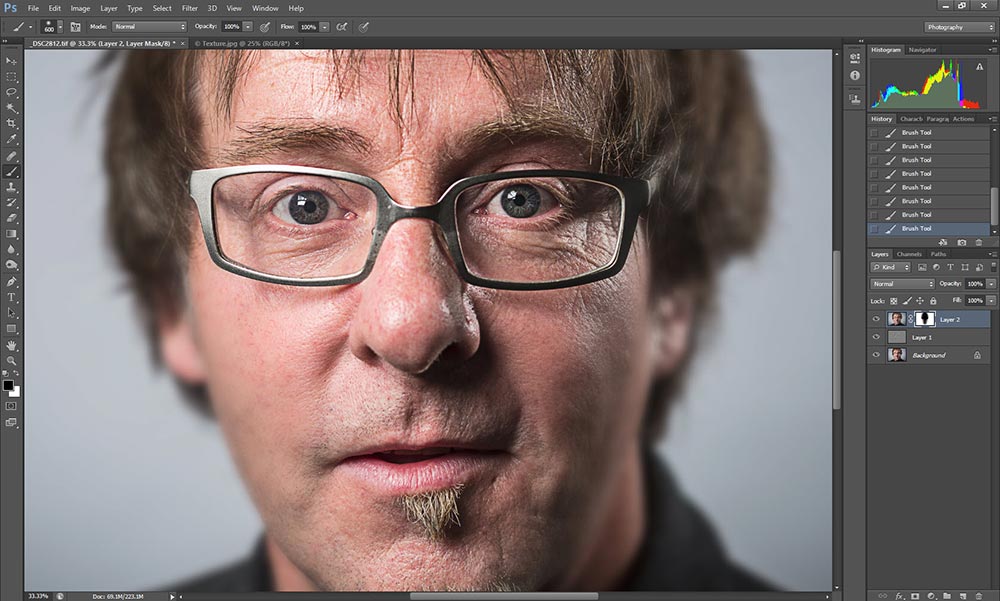
Click on the Layer mask icon at he bottom of the Layers panel to Add layer mask – it’s the icon showing a rectangle with a circle in the centre. Press D on the keyboard to set the foreground and background colours to black & white. If white appears in the foreground hit X to switch to black. Now press B on the keyboard and select a large soft edge brush (around 1500 px) to mask out blur over the central part of the face. If you make a mistake press X to bring white to the foreground and paint over the offending area. Take time when doing this because what you’re aiming for is a believable shallow depth-of-field effect.
4.Convert to black & white with the Channel Mixer
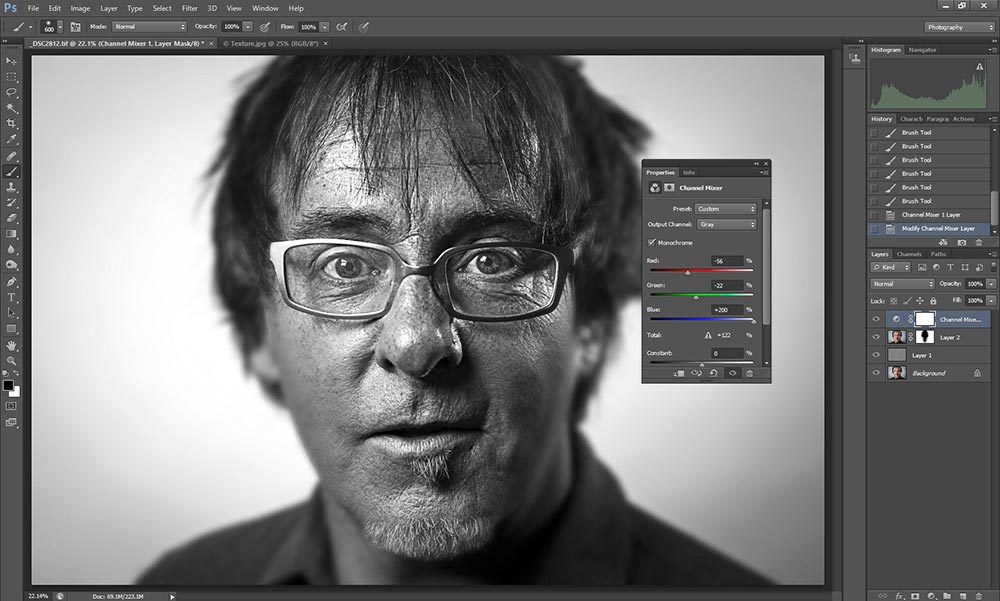
Click on the adjustment layer icon at the bottom of the the Layers palette – it’s the half-black half-white circle. Select Channel Mixer from the list of options. Next check the Monochrome box to convert the image to black & white. Now it’s time to create the highly detailed skin effect, so as a starting point set Red to -100, Green to 0 and Blue to 200. Now move the red slider to the right until the image is as bright as you’d like it to be. If highlights are blowing out drag the Green slider to the left. My final settings for this portrait were Red -56, Green -22 and Blue 200. All images are different so you’ll have to experiment on an image by image basis.
5. Lighten and dull the image
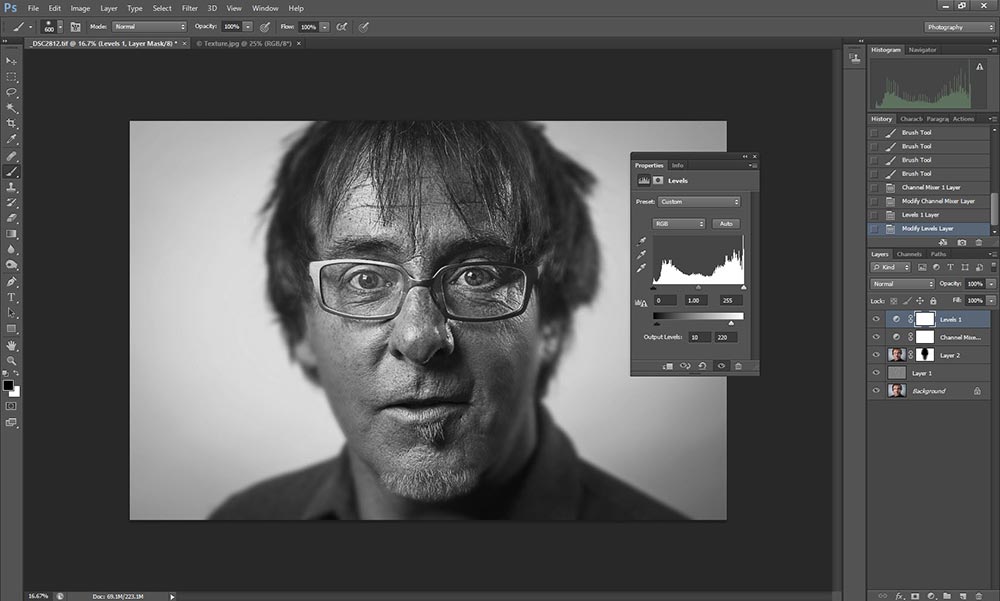
Go back to the adjustment layer icon and select Curves from the list of options. Left mouse click in the centre of the curve and drag up and to the left slightly to lighten the image a touch more. Close the Curves dialogue when you’ve finished. Click on the adjustment layer icon again, and this time select Levels. Set Output to 10 for blacks and 220 for whites. This will dull the image slightly to give it a more authentic look.
6. Select and Copy a texture
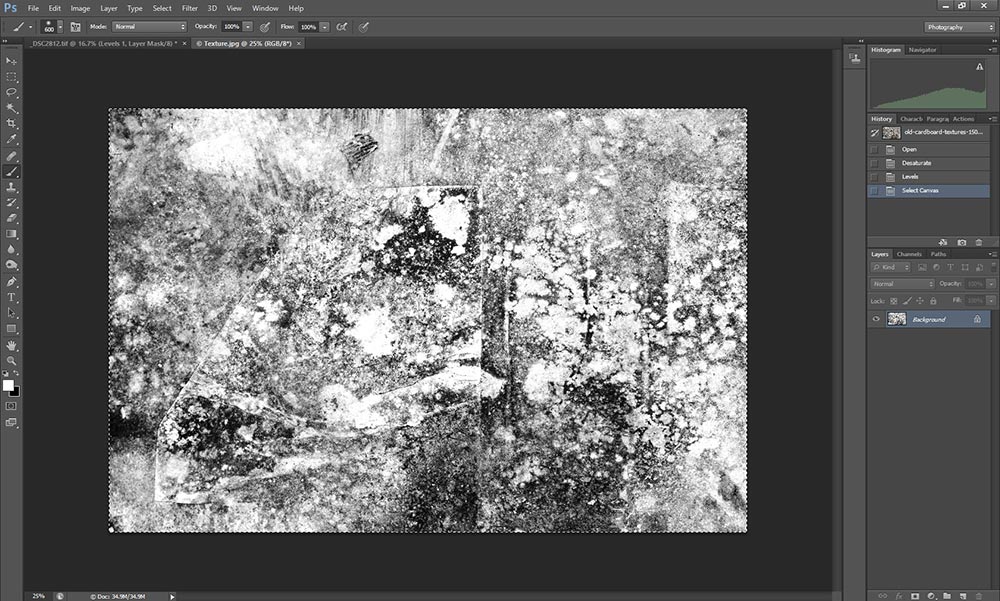
Now it’s time to mimic the smugded emulsion effect typical of the wet plate collodion process. Open your texture image and convert it to black & white if it isn’t already. Next hold down Ctrl+A to Select All, then Ctrl+C to Copy. Click on the tab for the portrait image and press Ctrl+V to paste the texture onto the image. Go to the Blending modes menu on the Layers panel and select Multiply from the list to add a degree of transparency to the Layer.
7. Duplicate the texture and change Blending modes
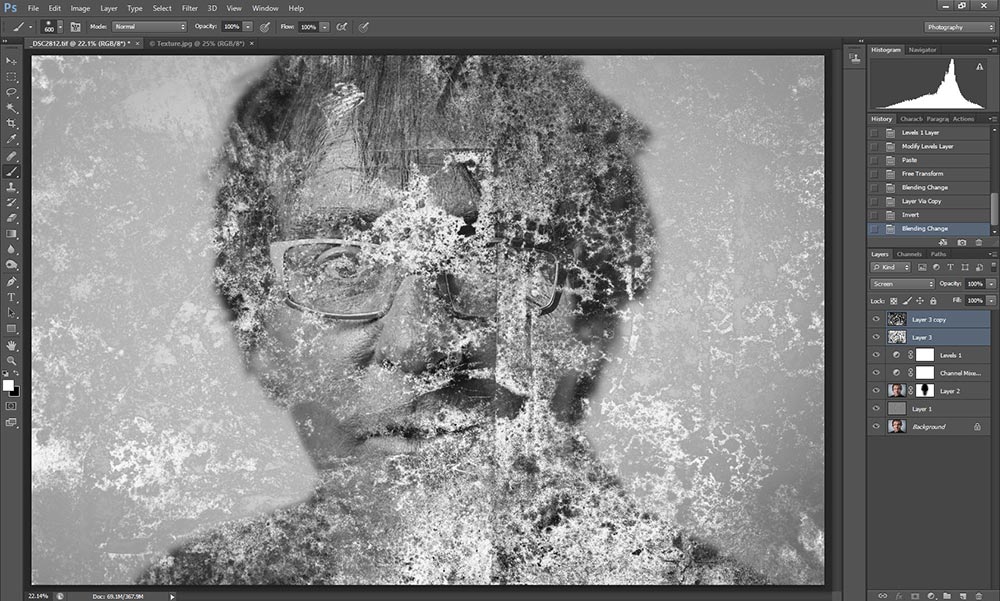
Hold down Ctrl+J to make a copy of the texture Layer, and then press Ctrl+I to invert it. Now go to the blending modes menu and select Screen from the list. Press V on the keyboard, then left mouse click and drag the layer so the two textures are skewed. Hold down Shift and left mouse click on the texture Layer below so both textures are now selected. Press Ctrl+G to group the Layers, and reduce Opacity to around 10-15%
8. Sepia tone the image
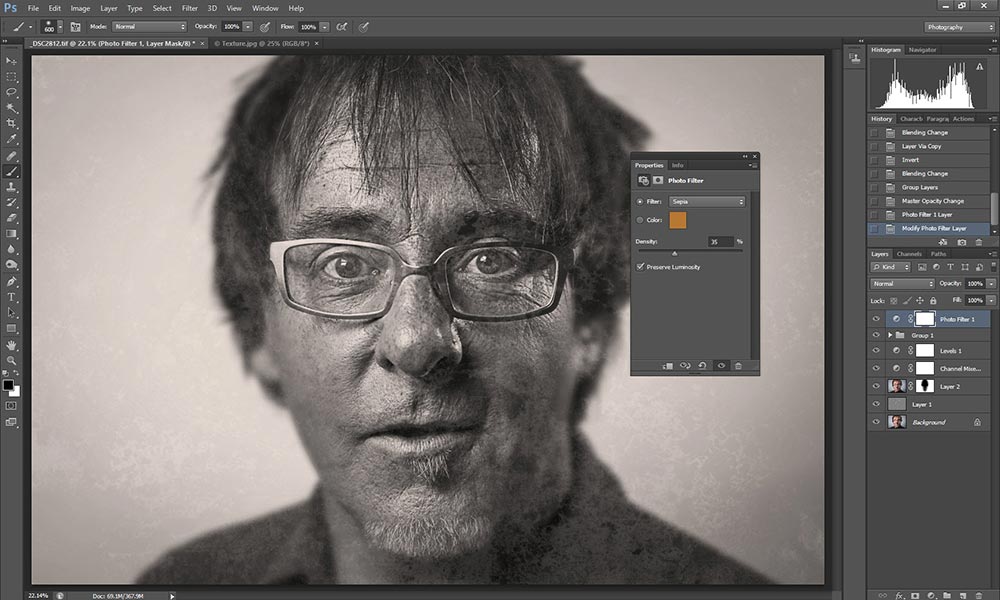
Go to the adjustment layer icon and select Photo Filter from the list of options. When the dialogue box opens click on the dropdown menu that’s set to Warming filter (85) by default and select Sepia. Drag the Density slider to the right until it’s set to between 20 – 50% This will give the image a natural warm look. The wet plate collodion effect is now complete. You can now keep all the Layers intact or Flatten the image.
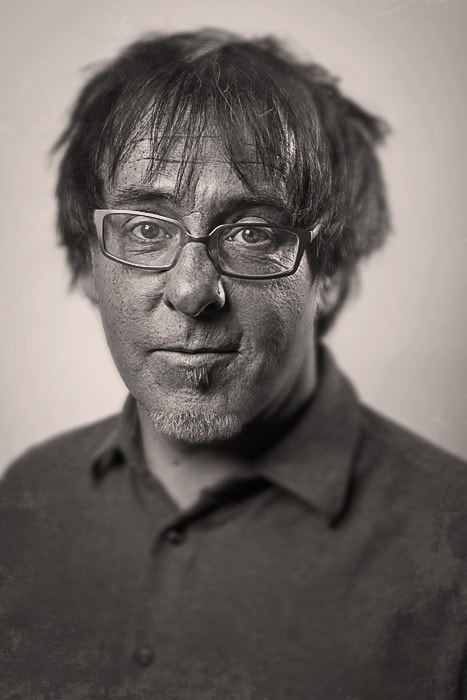
Below is the final result of the wet plate collodion effect in Photoshop. Use the slider to view the before and after images.
Wet plate collodion before & after

The Digital Darkroom: The Definitive Guide to Photo Editing
 My new book, The Digital Darkroom: The Definitive Guide to Photo Editing is now available. Photo editing is a vital part of the image-making process. Just as darkroom techniques were important skills to learn in the days of film, a clear understanding of post-processing is now key to getting the most out of your digital pictures. Easy to follow and accessible for readers of all levels of knowledge, The Digital Darkroom is the definitive guide to post-processing for users of Adobe Photoshop and Affinity Photo.
To find out more and order your copy click here
Improve your photography and Photoshop skills with a 1-2-1 training session
If you enjoyed this post you can support this blog on Ko-fi here
Check out more of my Photoshop tutorials on my blog, or visit my YouTube channel where you can subscribe to stay up to date with new videos www.youtube.com/jamesabbottphoto
To take a look at my landscape photography click here
This is a cool process, James. Is there a work around at the channel mixer stage for PSE? I can’t think of a way. Thanks.
Thanks Nigel. I don’t think there is. In Photoshop you can also use the Black & White Adjustment Layer, but I don’t think it’s available in PSE.