 Installing Photoshop Actions is one of the easiest tasks you can perform in Photoshop. All you have to do is double click on the .atn file, and the Actions will load into Photoshop automatically. Ocassionally, this doesn’t work so you have to install them manually. Here’s how it’s done…
How to install Photoshop Actions
Step 1. Uncompress the ZIP file

Most Photoshop Actions are packed into a ZIP Archive. Double click on the Zip file that you downloaded. The archive will open showing a folder with the same name inside. Drag the folder to your Desktop, and backup to an external hard drive, USB pen or burn to a CD. This will ensure that if your computer fails for any reason you’ll still have a copy of your Actions.
Step 2. Open the Actions Panel

Open Photoshop and if the Actions panel isn’t already open go to Window>Actions. The Actions panel will appear with the Default Actions folder expanded. Click on the arrow to the left of the folder to minimise it. This will make it easier to work with your PixelEfex Actions once they’re loaded into Photoshop.
Step 3. Load Actions
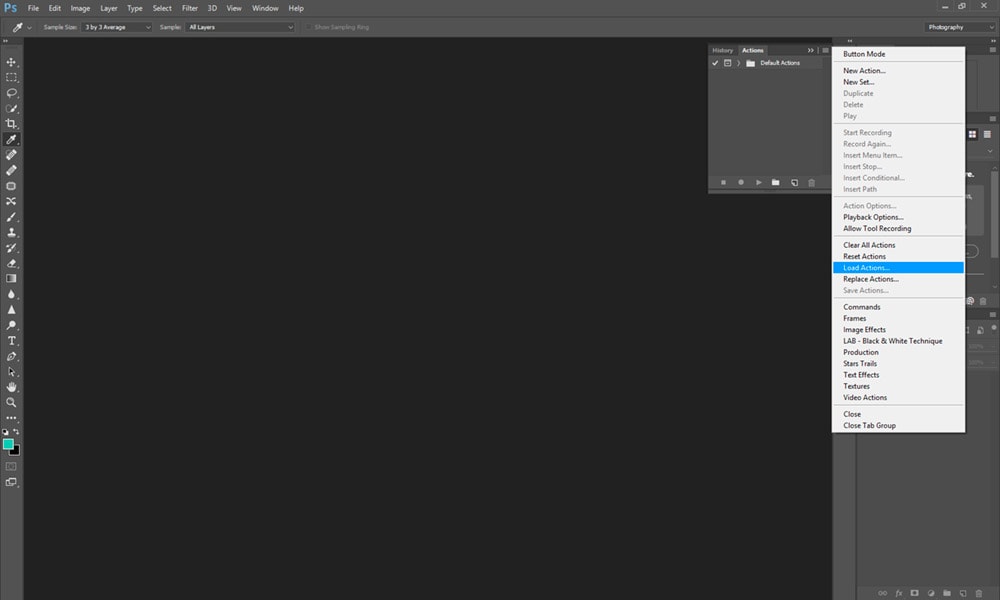
At the top right of the Actions panel there’s a menu icon that’s made up of four horizontal lines. Left mouse click on the menu and when it expands click on Load Actions from the list of options. At this point you’ll need to locate the folder you extracted from the ZIP archive and saved to your Desktop.
Step 4. Select .atn file
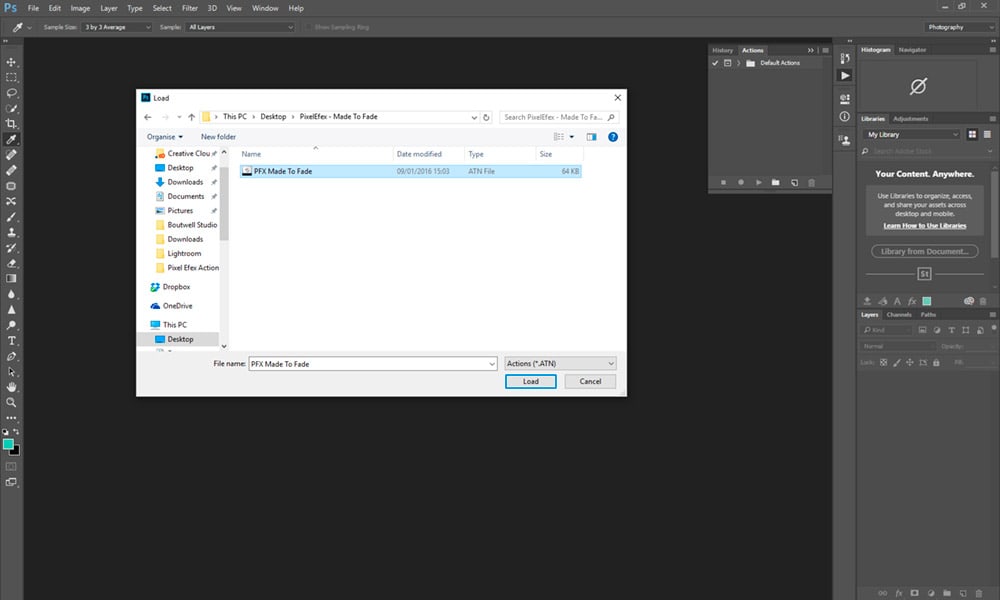
When the window opens navigate to your Desktop or another folder if you saved your Actions elsewhere. When you locate the folder left mouse click on the file before pressing the Load button. The Actions will now load into Photoshop and will be available on the Actions panel.